Tuesday, 25 October 2011

CUPCAKE DECORATION CLASSES


Well I just wanted to let you all know that the cupcake decoration classes are going really well and the ideas keep flowing. I have now completed two designs for the forthcoming Christmas workshops and I thought you might like to see the photographs.

There is quite a lot in the melting pot at the moment, with a plan to do On-line cake decoration classes, so those of you who are outside the UK and would love to learn how to create the perfect cupcake and decorate them - this will be perfect for you.

If you would like to register as a follower on my blog and also add a Like to my Facebook pages I can keep you posted.

Ann xx

http://www.facebook.com/CreativeCakeAcademy

http://creativecakeacademy.blogspot.com/

Thursday, 1 September 2011

CUPCAKE WRAPPERS - A NEW DESIGN


These are a new range of Cupcake Wrappers called Rose Garden. They are in a pdf digital download format and come in a set of 3 wrappers, matching tags and a sheet of pretty matching spotty paper to print on the reverse of the wrappers. The beauty of Cupcake Wrappers that are digital is that you can print as many off that you want, whenever you like, so you never have to keep paying for the wraps over and over again. They are shortly to be released with some freebies on offer, so if you are interested in knowing more about them please register as a Follower on this blog page and on our Facebook page to be kept informed of their release.

http://creativecakeacademy.blogspot.com/
http://www.facebook.com/CreativeCakeAcademy

There will also be a really pretty range of Digital Craft Papers and tags following the Rose Garden theme which will be released in the near future - again in a download format.

Ann x

Saturday, 16 July 2011

WE DID IT - 41 AND CLIMBING!!!!

Thanks everyone who had a chance to check into the Facebook page (see link in previous post) got to 41 and rising, with an extra special thank you to Jacque and Dawn for their tremendous support. I have masses of new ideas, just bursting at the seams with them - and maybe some blog candy along the way - so keep checking in to the Creative Cake Academy blog for details.

(The candy will be card related - so don't panic - lol).


Have a great weekend xx

Wednesday, 13 July 2011

WOW - A YEAR HAS GONE BY !!!!!!!

It is amazing to see that a year after The Next Level had to close its doors, we still have a massive following - you truly are dedicated followers.

Dawn and I are still great friends and have so many creative projects on the go it is amazing. For the time being I would just like to fill you in on what I am doing now - my time is spent between two passions - creating artisan soap and cake decoration and design. You can clearly see that I have not been able to switch off the creativity button. I need followers for my new cake decoration blog and at least 25 likes for my facebook pages before I can get a personal url - so any help would be so gratefully appreciated.

http://creativecakeacademy.blogspot.com/
http://www.facebook.com/pages/The-Creative-Cake-Academy/165180916881434

Ann xx

P.S. You will be pleased to know that I have finally sorted out my migraines, just need a good pair of glasses!!!!!!!!! -

Monday, 13 July 2009

THE NEXT LEVEL - ISSUE 7


.

THE NEXT LEVEL - ISSUE 7

Back to one full issue this week - so click on the links below to take you to all sections. We have a great Challenge this week which is a Sketch with a little twist. Fantastic prizes on offer from our Sponsors, Copic shading Tutorials and some extras, the usual Hints and Tips section and some really lovely Freebie downloads.


Ann and Dawn xxx

.

Scroll down the page to access each of the sections below

Announcements
Sponsors and Prizes of the Week
Challenge of the Week
Tutorials
Hints and Tips
Grab that Stash
Have Your Say
.


.

Challenge 6 Prize Winners

Our four prize winners this week, were chosen by Random.org - based upon the number allocated at the time the comment entry was made in the Challenge section.

The first selected prize winner is Beccy from Beccysbits. Congratulations you win the Kim Sherrod Stamp set of your choice. Click HERE to go to the stamp collection page so you can start choosing.


We now have 3 further Prize winners of the Bow Maker Kit from Stamp Simply. The three lucky winners are Jeannie from Lilac Kitty Creations, Regina from Scrap Creations, and Jill from A Life Well Crafted. If you were not a lucky winner click HERE to purchase one.

Could all prize winners please e-mail us at The Next Level so that we can arrange for you to receive your prizes..

SPONSORS AND PRIZES OF THE WEEK


This week our two sponsors have donated fabulous prizes for the two prize winners of the Challenge 7.

.


Priscillastyles is the creator of the most fantastic Envelope Templates, that are in varying sizes, but the prize that is on offer today is the 6 x 6 inch thick envelope template which is ideal to use with the 3D cards featured in the Challenge this week. Alongside the Kit, Priscilla is also giving away this magnificent envelope that she has prepared using the kit. Click on the Priscillastyles link above for more details of how you can proceed to purchase these kits it you cannot wait to see if you are the lucky winner this week.


.


Hope Stamps Eternal have a fantastic on-line store and they are offering a


$25 CREDIT VOUCHER


for the winner to spend of items of their choice - what a great prize. Click on the Hope Stamps Eternal link to go direct to their website to browse the store - you will not be disappointed.
Currently they are taking pre-orders for the Autumn collection of Martha Stewart punches - definitely one not to be missed!!!!


.


The winners of this week's prizes will be announced under the Announcements section of Issue 8 out next Monday. The winners will be selected by the first 2 numbers selected by Random.Org. based upon the number allocated at the time of posting their challenge entry.


Good Luck everyone xx

CHALLENGE OF THE WEEK


.


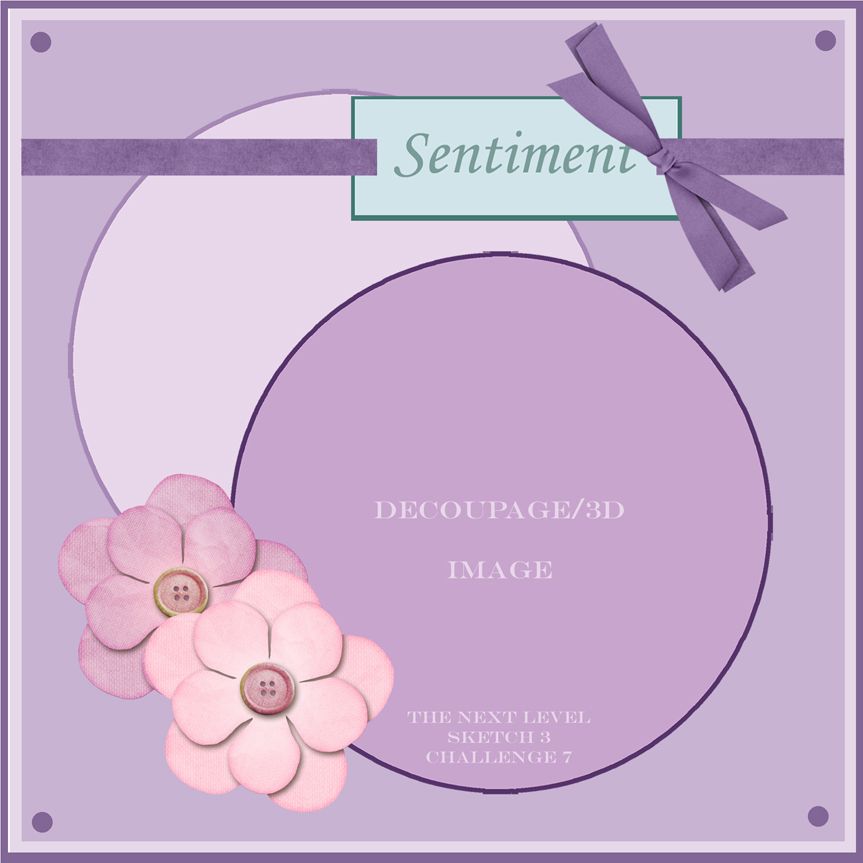
CHALLENGE 7 - SKETCH WITH 3D IMAGE

.


.his week we have a Sketch for you - but with a twist - your image needs to be layered or raised in a 3D effect. The design team have created some fantastic cards to give you inspiration. A special Thank You this week to Jacque from Jacque's Joie De Vivre who is our Guest Design Team member of the week - thank you Jacque for your gorgeous creation


.


Click HERE to download the actual size template


Click on the Design Team cards to open them in a new window for more detail, and click on the DT name over the card to take you to their blog site for more detail on the created their card for the Challenge this week.

.

ABBY


BETH


DAWN


DEBBIE


JACQUE


TRUE


Closing date for entries to be in for the prize draw is Sunday 20th July - 9pm UK time.

TUTORIALS OF THE WEEK


This week we have Two Tutorials - centred around using Copic pens, but in the case of the First Tutorial, you can easily use Pro Markers to get the same effect. The second Tutorial is designed to assist you in Choosing your Copic Colours from their fantastic range of 322 colours to get the right colour blend and shading, together with a downloadable Blank Colour Chart for you to keep a track of the colours you purchase.


SHADING WITH ALCOHOL INK PENS


When I made my DT card for Issue 1 of The Next Level, I took photographs at each stage of the colouring to show how the finished effect was made up. The secret to colouring with Copics or Pro Markers is to start off with the lightest shade possible. When I first started buying Copics and Pro Markers - I always went for the bright and pretty colours, but quickly learned that my images lacked shading and depth, because if you start off with too dark a colour, you really have nowhere to go when you want to shade it even darker.


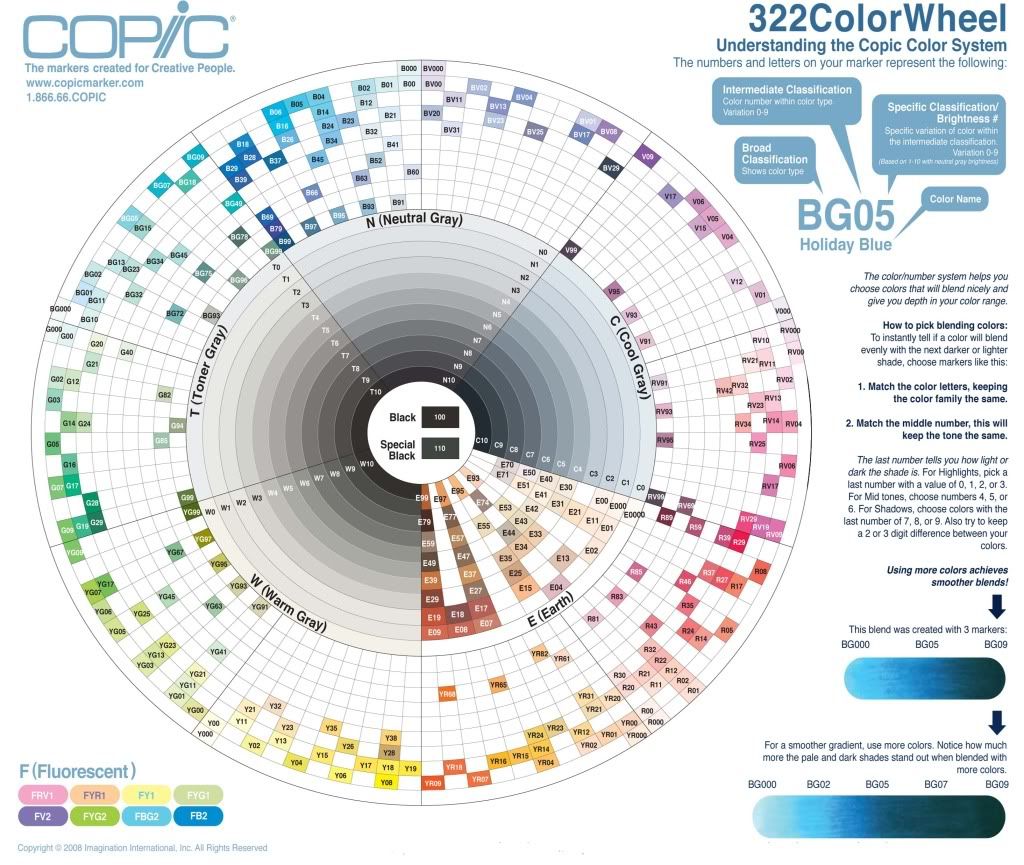
Later on in the Tutorials, I have shown the Copic Colour Wheel to help everyone understand the Copic Colours, and the best colours to start most images off with are the ones on the very extreme of the colour wheel, usually with numbers ending in 00, 000, or even 0000.
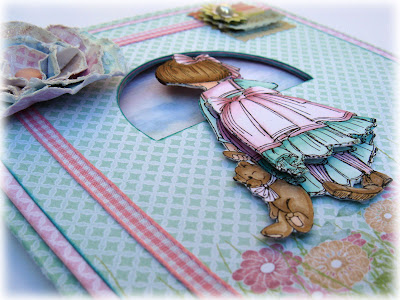


Above you will see the finished image, which has been layered to produce a 3D effect. This does mean quite a bit of work, as you have to colour each image separately - always make sure you keep your best one for the top layer. In all of the images below you will see on the right hand side a completed image, so you can track how it is made up in the varying colouring stages.


To start with the whole of the pink section of the dress was coloured in RV00
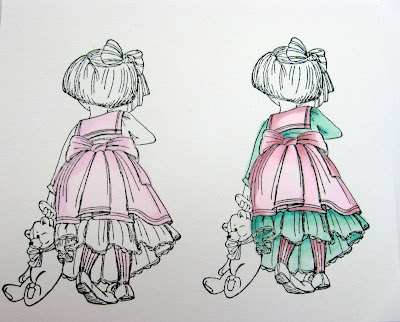
Now go over the outside edges and in the creases and folds with the same RV00 to build up some depth

Then I have started to build up the shading with RV02, clearly defining the edges and where dark shading will fall. I am cautious that I keep the centre areas untouched now as much as possible because this is where I deem the light will be falling, full on the front.

I finally added RV34 to the areas I wanted the most depth and then again blended this in with the RV00

Now I have started to colour the green part of the dress. Here I have used BG10 and coloured all parts

Here I have started to show the shaded areas with BG13 colouring the areas that would be shaded from the light or darker because of folding

Now I have used the darker of my 3 greens, BG15 and put deep colouring on the areas where I want to show the most depth and shade

Then I blended all three colours together with BG10 my lightest green shade, pushing the colours towards the lightest section, but not going over the paler area where I want to keep the most light falling on the dress
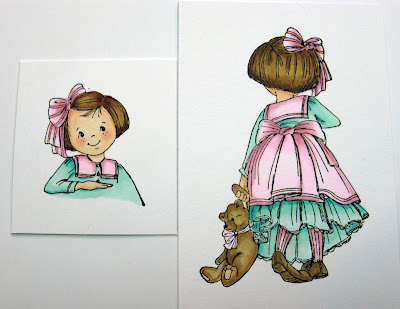

Here is the finished image completely coloured and ready to go on the card.

.


THE COPIC COLOUR WHEEL

Copic Markers come in a range of 322 different colours - just amazing - choosing colours is just like being in a Sweet Shop. But be wary and buy wisely - as there is a method is choosing the blend and shade of colours to get the right effect in your colouring.
The Copic pens come in 3 different types, the Original Marker, which are the largest of the 3 and square in shape, the Sketch which is the next size down and oval in shape, and finally the Ciao which is the smallest in the range and circular in shape. Average prices are around £5 for the Original, £3.50 for the Sketch and £2 for the Ciao. The 322 colour range is available predominantly in the Sketch range. If you use the Copic Airbrushing system, it does state that this only works with the original Markers, but I find that they work just as well with the Sketch

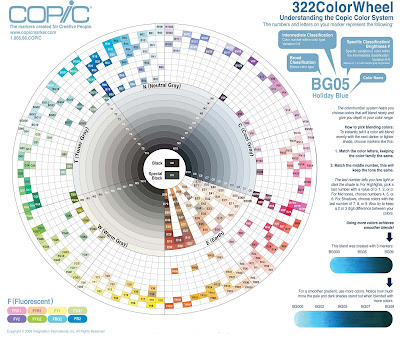
The Colour Wheel below is downloadable, either by right clicking on the image and pasting to your desktop, or by clicking on the link below where the image will appear and you can then save. Ideally the best way to view the wheel to get the most information and detail of colour is on screen, you can print it off, but you will need to re-size the downloaded image, and remember the colours will ony be as good as your printer and printer inks define!!!!

You will see on the right hand side of the Colour Wheel the detail of how to chose the right colour, how to make sure that colours blend together and are in the same 'family' of colours, and how to select a set of ideally 3 close colours in the family, to get the best effect when blending and shading.
Click on the Image below and this will open up to fill your screen so you can get a good view of the colours and then scroll to the right to see the information of choosing the right range of colours.


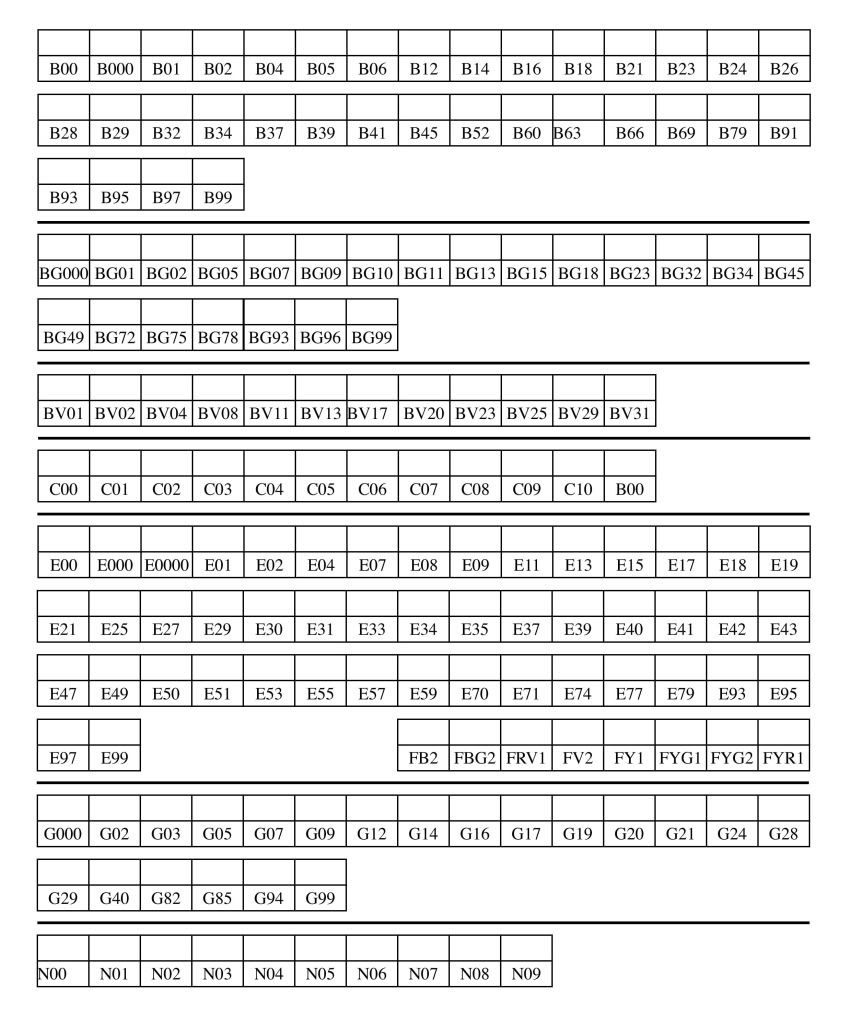
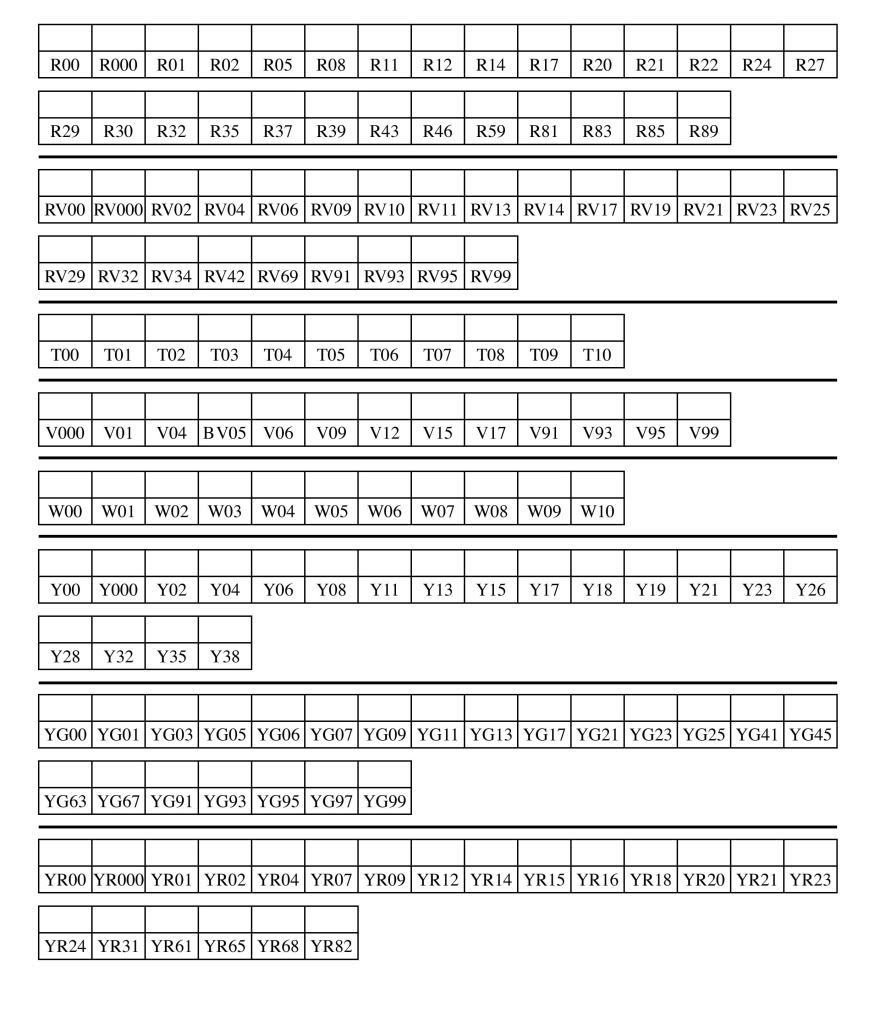
Below is the image of the 2 pages that you can download from the link below so that you can colour in the sections as you buy your Copic pens, to keep a track of the colours you have. When I am preparing to colour an image, I first pull all of my papers together and then sit them alongside my colour chart - I then write down the numbers that offer the best colour combination and then go and select from my stash.
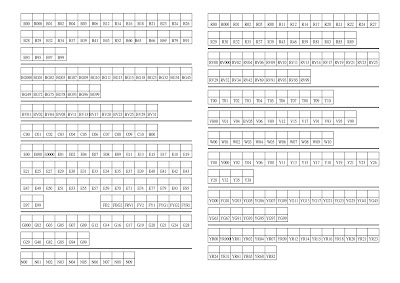

Here are the links if you wish to download the images of the blank colour charts, and remember you will need to re-size them on your printer to fit on two A4 sheets. The link is also below for the Copic Colour Wheel - again resize this to suit, but you will get the best image and colour detail when viewing on your computer.

Copic Colour Wheel

Copic Blank Colour Chart 1

Copic Blank Colour Chart 2

.

Well I hope this has given you food for thought on using Copic and Pro Markers. I by no means am an expert in the art of colouring, but I am learning, and the best way to learn is to keep practicing - enjoy !!!!

Ann xxx

HINTS AND TIPS


Did you know?

1. When using Rub-ons on your project, breathe on them first before using them as this helps them to release from the carrier sheet more easily.

2. When your ink pads are running out, turn them upside down for a few minutes before use to get the last drops of ink to the surface.

3. When using embossing powder always use an anti-static bag to wipe over your work first, or a tumble dryer sheet, as this will help stop excess embossing powder sticking to your work.

4. When heat embossing on Vellum always heat from underneath to stop the Vellum warping.


BORDERLESS PRINTING

A great tutorial from The Hybrid Chick on borderless printing. Click HERE to take you to the Tutorial pages.

GRAB SOME STASH


We have been on the scout around again this week to find you some really gorgeous freebie downloads and we hope you will not be disappointed with what we have found.


A really great kit from Digital-Crea - click HERE to go to the product page, you will need to go through checkout, but the item is Free.


Another really pretty kit from The Little Scrap Garden - click HERE to go straight to the download page

A great Vine Brush from Bluebird - click HERE to go straight to the download page


Word Art freeebies from Choukette Design - Click HERE to go straight to the download page

.

Have fun!!

HAVE YOUR SAY !!!


We would love you to take the time to stop by this section and Please give us feedback on this issue of The Next Level

Friday, 10 July 2009

THE NEXT LEVEL – FRIDAY SUPPLEMENT – ISSUE 6


Good morning everyone - Welcome to the Friday supplement of Issue 6 of The Next Level

.

We hope you have enjoyed having your Magazine in 3 supplements this week and it has not spoilt your enjoyment of your weekly read. Please keep the feedback coming in, we do love to hear from you.
.
Today we feature a stunning TUTORIAL FROM ABBY, one of our Creative Design Team members. You may have seen a really stunning card a few weeks ago from Abby where she did a 3D rose on her card - it was absolute perfection - so we asked her if she would not mind showing how she had achieved this beautiful effect - and here it is for you all today.

.

Hint for Monday's Challenge 7

We did say that our Friday Tutorials would in many instances link up what what is going to be on the horizon for the Monday Challenge and this week is no exception. We will not be asking you specifically to make up a rose just like Abby's - but if you do not have in your stash some glue such as Beacon 3 in 2, Pinflair, Mini Glue dots or Double sized Craft Foam pads - you might want to pop out and get some over the weekend !!!!
.

Quick Links to Issue 6 Supplements
Below are the Quick Links to the Monday and Wednesday supplements and remember -There is still plenty of time to enter the Challenge 6 this week with 4 prizes on offer.

Closing time for entries - Sunday 9pm Uk time.
If you wish to enter and do not have a blog, please e-mail us your photograph and we will post it for you.
.

Have fun everyone - See you on Monday
Ann and Dawn xxx

.

.

3D ROSE TUTORIAL FROM ABBY


1. Stamp the image multiple times onto water color paper using black Staz On ink. I prefer lighter weight water color paper for my 3D floral images because it is easier to manipulate into your desired shape

.

2. Water color the images as you desire. For this rose I focused on coloring the large rose only since it will be cut out it was not necessary to color the images in their entirety. This helps to cut back on work and time

.

3. Once you've water colored the images cut them out as close as possible. Select one to keep as your base then proceed to cut along the lines of the petals on the remaining images. Don't worry about cutting perfectly since it should be a natural, untailored look. Just be sure they resemble the shape of rose petals. One key point is to color the back and along the edges of each one with a matching marker so that there’s no white showing underneath or throughout the edges of petals

.

4. Select one of the larger petals to start building the outer edge. Curl the bottom edge of the petal slightly and add a touch of glue to the curled edge then place it on the rose image. I use Beacon 3 in 1 glue because it holds beautifully but also allows you to move the petals if you happen to make a mistake or decide to move the petal to a different location. Just be sure the glue is not completely dry or you may tear it

.

5. Once you've glued the first petal allow the glue to dry and gently shape it with your tweezers

.

6. Continue the same pattern with the rest of the petals starting with the larger ones for the outer edge and the smaller petals for the center

.

7. As each petal dries you can go back with your tweezers to gently shape the petals so that they resemble the look of a real rose

.
8. Once you're getting close to the center select one of the smallest petals and curl it inward and use a mini glue dot to place it in the center. This will offer a guide for the placement of the remaining petals. You may find that you'll have to trim the petals to fit your desired space

.

9. Once you're finished adding all of the petals grab your tweezers for some final shaping then finish with a touch of glitter on the edge of each petal

.

10. Here’s the finished rose which will be added to a future creation. Hope you'll give it a try!

ABBY

.