
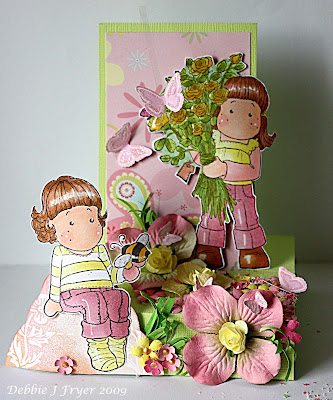
1. For the base, cut a piece of card 4¼” x 11”. Stamp at this stage if desired
 3. Mark ⅝” in from both sides on the 5½” scored line. Cut a narrow strip between these marks. Leave base card to one side for a moment.
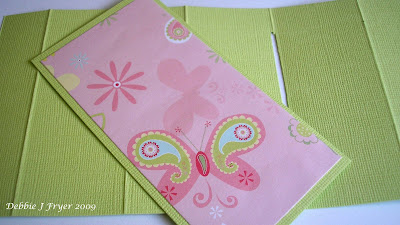
4. For the stand-up background cut a piece of card 2¾” x 5¼”.
5. Cut a piece of decorative paper 2½ x 5” and mat onto card you have just cut
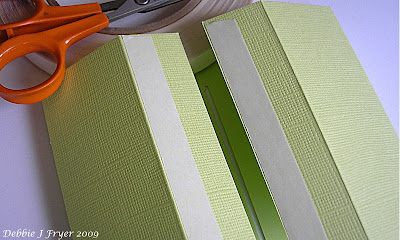
6. Now back to the base card. Apply double-sided tape, or glue to the right side of the two 1” end sections. (One strip next to score line, and one at the edge). It is important to get this in the right place, as it will hold the tag in place. See steps 8 & 9
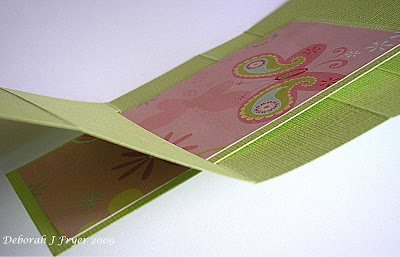
7. Pop the ‘tag’ through the slit in the base
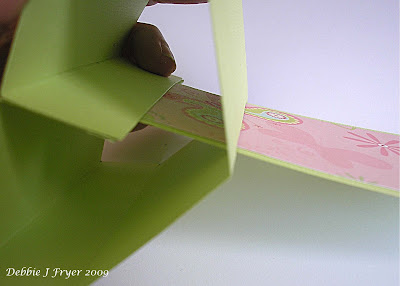
8. Turn over and fold base around, trapping bottom of tag in end folds.
9. Press on to tape or glue to secure.
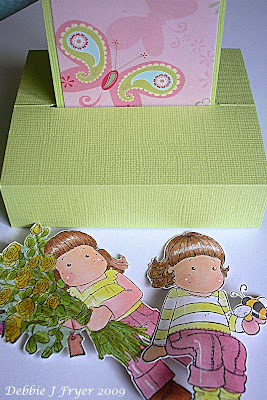
10. Congratulations, your card base is now complete. At this stage your card will fold flat to fit it in an envelope, however if the embellishmentsare bulky you may need to make a box for it to stand in.
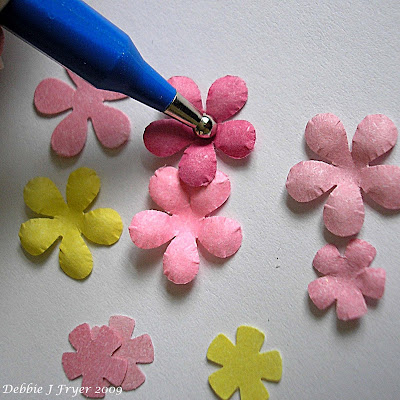
11. I used Prima hydrangea flowers; I also punched out flowers using an EK Success Retro Flower medium punch, that I shaped with a ball tool, and ready made paper roses. I used a Martha Stewart butterfly punch to make the butterflies
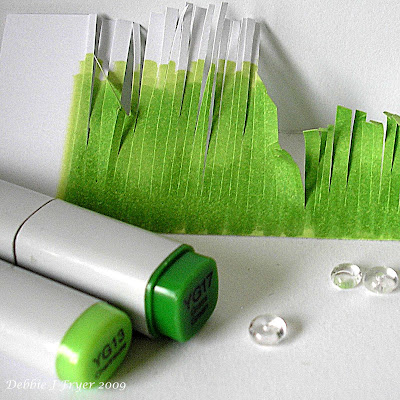
12. The tufts of grass were made by colouring ordinary copy paper then cutting slits along the length to make a fringe. The top was randomly shaped, then pieces cut off and added to the design where required.
There are many different options and themes you can use. Just let your imagination run riot and have fun producing something truly unique. I chose to do a butterfly theme so this is my Magnolia Butterfly Card

.
STAIR STEP FOLD CARD
.
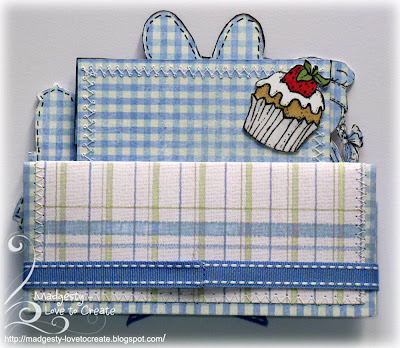
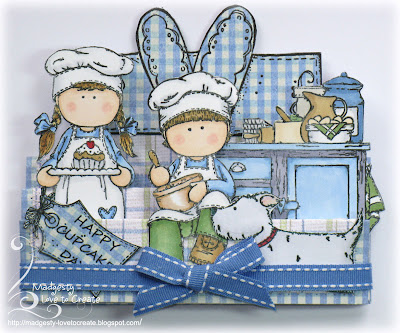
6. To keep your Stair step fold card closed - there are many pretty ways to do this by adding ribbon detail. My example below is done simply by folding a piece of ribbon right around the closed card and marking with 2 pins where the ribbon joins at the rear. I then stitched it on the sewing machine and added a pretty bow to the front. This now slides off completely to allow the card to be opened, but can be fully closed and held in place by the ribbon band
Hope this gives you enough detail to create your Stair Step Fold card - I have given a detailed breakdown on the make-up on this card on my blog if you need more information
Have fun, Ann xx
.
COLOURING STRAIGHT HAIR WITH COPIC MARKER PENS
To really get nice looking hair you have to understand a few things about hair:
• Hair is not all one color
• Hair catches light in small clumps, not flat
• Healthy hair is shiny, and shiny things have more contrast
• Hair has layers, a front side, a backside, and it curves around your head
When coloring hair, keep in mind:
• ALWAYS color in the direction the hair grows
• Streaks are OK, and the back of the paper doesn't need to be soaked.
• Try lots of different color combos until you get the look you want
• Pay attention to where you put your shadows.
• As you layer colors, leave bits of the base color peeking through to give your hair dimension.
 As you begin coloring hair you should practice on some scratch paper to get the technique down. I've noticed in my classes that a lot of people have trouble with basic feathering using the brush nib.
This technique is useful for feather blending, making grass, and other basic coloring so if you are not comfortable with feathering I urge you to practice, practice, practice!
I feather by holding the brush at a slight angle and lifting up at the end of each stroke. Consistency is the key. I want each stroke to start in the right place and lift up in the same place as well.
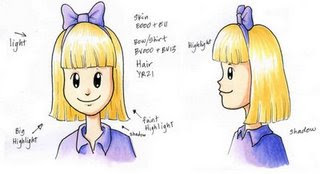 I want my hair to look a nice golden blonde color, so I'm going to lay down a base color of YR21. (Other good pale blonde base colors include Y00, Y11, Y21, YR31, though you should experiment on your own). You can see that with one color her hair looks OK, but it's not very exciting.
To make the hair appear shiny I am leaving highlights along the sunny front edge of the hair, and along the top of her head where the hair curves down to hang straight. The hair will be slightly darker on the shadow side of her head and down behind her head along the back of her neck.
 Now I can accent her hair and darken it up by adding streaks of Y28. To get thinner streaks I hold the marker more vertical and use only the finest tip of the brush. I deepen the darkest shadow areas by letting the base colors dry then adding another layer of color. Always color in streaks and leave some of the lighter areas show through. This keeps the hair from looking too flat.
Notice how the darker yellow really tones down the hair. Now it looks more believable as a hair color and you can see shape of her head better. I hope this helps you as you color. Have a great day!
We hope that you enjoyed the tutorials this week, and remember you can print of the Tutorial section in isolation if you want to refer back to them as you create your card and colour your images.



This was so very helpful, thank you
ReplyDeleteI'm so excited to give all of these a go !! thanks for the wonderful inspiration
ReplyDeleteThese are great tutorials this week. You are spoiling us with three. Can't wait to get going with them. thanks hugs Shelley
ReplyDeleteThese cards are amazing - can't imagine I could ever manage anything quite so good, but thanks for the inspiration. I will be trying the tutorials out in the privacy of my own home LOL!
ReplyDeleteGreat turorials, thanks!! Will try and have a go. Particularly like the free standing pop-up card. Claire xx
ReplyDeleteThese cards are fantastic. Thanks for the lessons. I hope I get a chance to try them out.
ReplyDeleteOmg! Those cards are amazing and love the lesson in hair colouring...wish it was so easy for my greys. :-)
ReplyDeleteFab tutorials thanks. Love your blog
ReplyDeletexx Vee
these are wonderful tutorials! I've printed them and will get to work as soon as I can
ReplyDeleteThanks for all the help. Ann thanks for the tip about putting patterned paper on the back of your images before you cut them out!! Wonderful tutorial!
ReplyDeleteJudy xx